Gluten-free Artisan Style Boule Bread - Vegan
The Ultimate Gluten-Free Bread (Vegan)
For the gluten-sensitive bread lovers out there, this is an awesome loaf. This bread looks, feels, and almost tastes like old-fashioned sourdough.
If you, like me, doesn't tolerate gluten and misses the taste of good old-fashioned bread, you can stop your search now.
This bread has a flavor that'll get you hooked, a crispy crust, and a soft, chewy crumb. In fact, it tastes better than the best gluten bread I've ever tasted.
I was fed up with buckwheat and rice flour, so I searched for new inspiration and created this flour mixture. I'm so excited about it.
The bread is easy to make, it takes care of itself most of the time, and if you follow the slightly special baking instructions, there's a sure win for success.
About the Ingredients
Psyllium Husk
Psyllium Husk is crucial if you want to bake good gluten-free bread.
Gluten is what gives dough elasticity and lightness.
When mixed with water, psyllium husk forms a gel – which acts as the gluten substitute in the dough and the baked bread. Without the husks, the gluten-free bread gets flat and dense.

Active Dried Yeast
Buy activated dry yeast that's ready to add to the flour mixture.
Apple Cider Vinegar
Apple cider vinegar gives the yeast an extra activity boost by creating a slightly acidic environment.
Sorghum Flour
Sorghum has been grown for some 8,000 years, is now one of the top five cereal crops in the world, and has been a nutritional powerhouse long before science told us so. It's similar to wheat but has two significant differences: the seed has no hull and is gluten-free.
The crop itself is good for the environment. Its high tolerance for heat and drought makes it an exceptionally efficient crop. Sorghum also improves air quality by removing carbon from the atmosphere and storing it in the soil. You can substitute sorghum with buckwheat flour.
chestnut flour
Using chestnut flour adds a rich and subtly sweet taste, lending a slightly deeper hue to the bread.
Oatmeal Flour
Oats stand out from other cereals because they contain healthy fatty acids and fibers like beta-glucan. Beta-glucan is particularly good for the heart as it can contribute to maintaining normal cholesterol levels. Oat is beneficial for digestion and has a relatively high protein content for cereal. It's one of the more effortless flours in the gluten-free kitchen. You can easily make your own oat flour simply by blending rolled oats.
Potato Starch
Potato flour is starch from potatoes and very little else. It's mainly used in bread and cakes because it makes the dough thicker and more cohesive. It's also (like cornstarch) excellent for thickening a sauce where you would otherwise use wheat flour. The taste is relatively neutral.
There's no significant distinction between potato flour and potato starch. Potato flour is made from whole peeled potatoes, cooked, dried, and ground into a fine, beige-colored powder. Potato starch is "washed" out of crushed potatoes, then dried to a fine, bright-white powder.
You can substitute potato starch with tapioca or arrowroot.
About Kneading and Rising
First kneading
You can mix the ingredients with your hand. I like to bring the dough together with a hand mixer and the dough hooks. Once the wet and dry ingredients are combined, I remove the dough from the bowl and place it on an oiled worktop. I knead the bread with lightly oiled hands too. I use coconut oil.
There's no right or wrong way to knead gluten-free bread. You don't have to go through the stretching motions you'd typically use to build up the elasticity in a gluten-containing wheat bread.
Before the bulk proof, shape the dough into a ball. Lightly flatten the dough into a disc, then take individual portions along the edges and fold them back, rotating the dough as you go.
You should now be left with a dough ball. Flip the seam side down and rotate it to seal the seams.
First rise
The purpose of the first rise is, first and foremost, to develop the flavor - this is what assures that your bread will have that wonderfully complex flavor we associate with properly baked bread.
Place the dough in a bowl and cover it with a damp tea towel. Place it in a warm place and let it rise for an hour. Or until about double in size
Second kneading
Once doubled in volume, you can knead and shape it again - similar to before the first rise.
Kneeding the dough a second time gives it more oxygen, providing the yeast cells another chance to multiply, resulting in smaller, more evenly distributed air bubbles after the second rise.
Second rise
Oil a 7-inch (18 cm) round proofing basket with coconut oil, sprinkle with flour, and place the dough seam side up.
Cover with a damp tea towel and place in a warm place for about an hour or until roughly doubled in volume.
The Oven Set-Up
Preheat the oven to 480 ºF (250 ºC) for 30 – 45 minutes before you plan to bake the bread.
The baking tray on the bottom shelf of the oven holds hot water to create steam in the first 20 minutes of baking – the steam will keep the crust of the bread malleable enough for the final expansion (oven spring) to take place before the crust starts setting.
Preheating the oven-proof tart pan, the pizza stone or baking steel, and the baking tray in the oven is important so that everything is scorching hot and ready for the perfectly proofed bread.
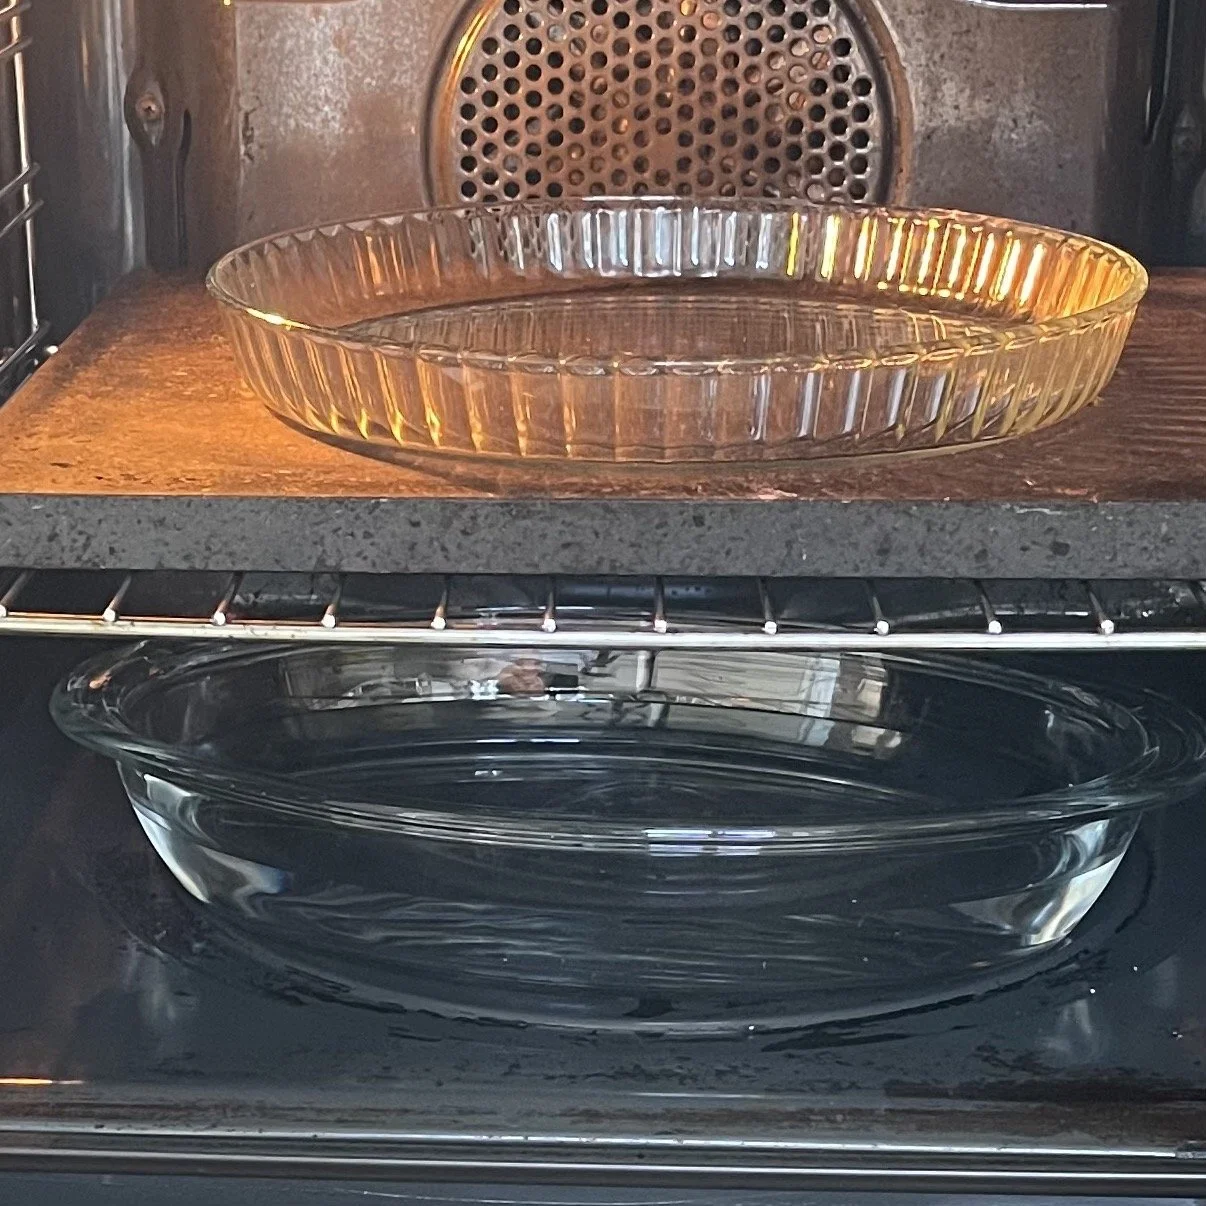
Oven set-up from the top: Oven-proof tart pan, pizza stone, and baking tray with water
Recipe
Prep Time: 30 mins
Cook/Bake Time: 1 hr
Rise Time: 2 hrs
Total Time: 3 hrs 30 mins
Equipment
Raising basket approx. 7 inch / 18 cm (optional)
Hand mixer with dough hooks or stand mixer with dough hook
Oven-proof tart pan
Baking paper
Ingredients:
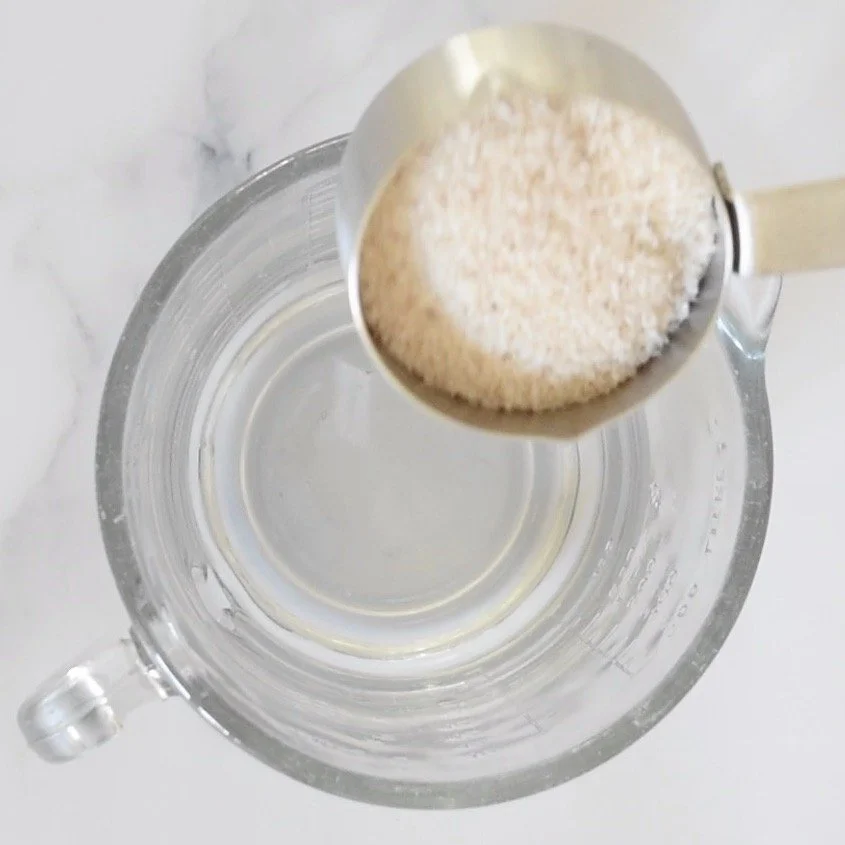
585 g. lukewarm water
8 g. Active dried yeast
30 g. Psyllium husk (rough husk form)
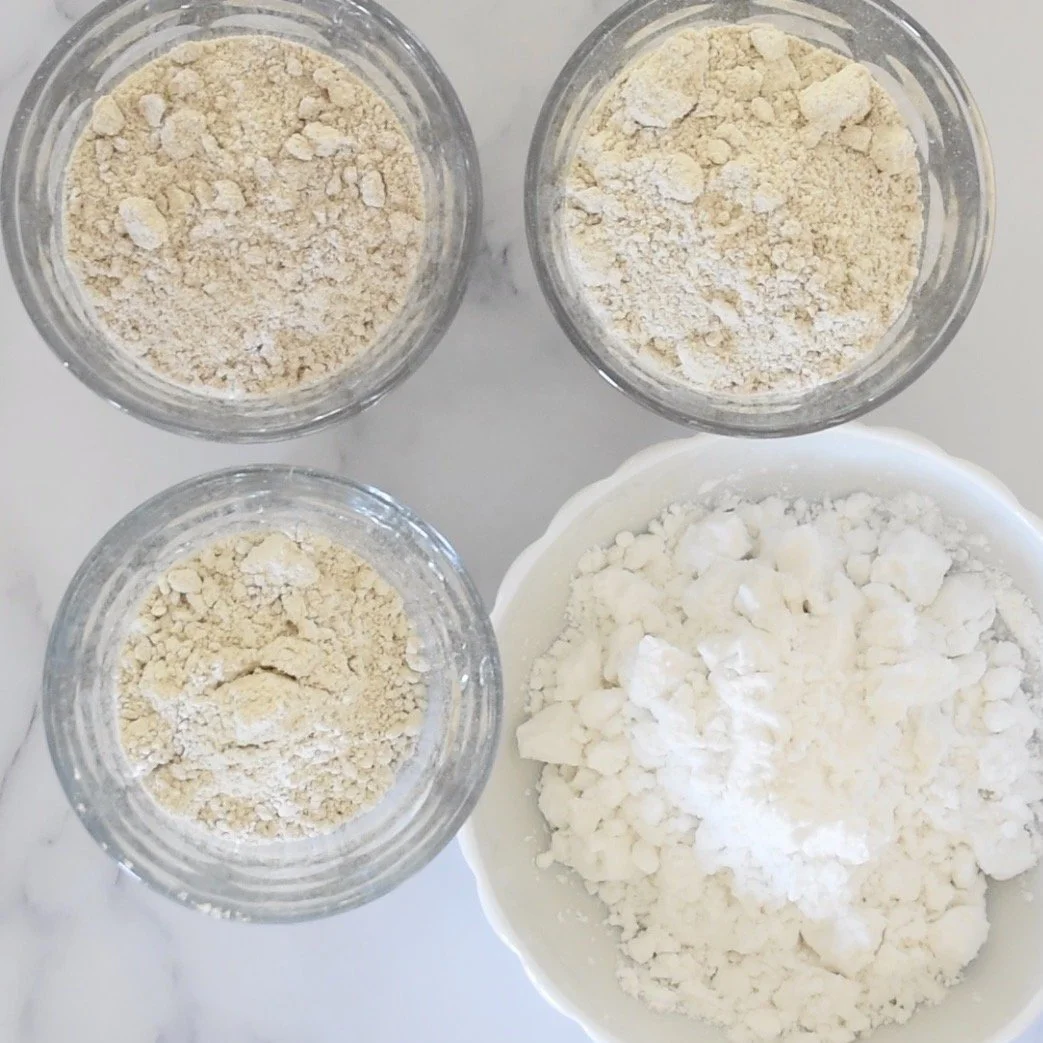
140 g. Oat flour
140 g. Sorghum flour
60 g. Chestnut flour
140 g. Potato starch or arrowroot powder
15 g. Salt
18 g. Apple Cider Vinegar
Instructions
Mix the psyllium husk and the water in a bowl. After about 15 – 30 seconds, a gel will form.
Mix the oat flour, potato starch, chestnut flour, sorghum flour, dry yeast, and salt in a large bowl until evenly combined.
Add the psyllium gel and apple cider vinegar to the dry ingredients.
Knead the dough until smooth, and starts coming away from the bowl, about 5 – 10 minutes. You can knead by hand or using a stand mixer with a dough hook.
Transfer the bread to a lightly oiled surface and knead it gently, forming it into a smooth ball.
Place the dough back into the mixing bowl, seam side down, cover with a damp tea towel, and allow to rise in a warm place for about an hour or until doubled in size.
Oil the raising basket (coconut oil) and sprinkle it with oat flour.
Once risen, turn the dough onto a lightly oily surface and gently knead it gently while forming it into a tight ball.
Place the dough into the proofing basket. Cover with a damp tea towel and proof in a warm place for about 1 hour or until doubled in size.
While the bread is proofing, preheat the oven to 480 ºF (250 ºC) with the tart pan, baking steel, or pizza stone on the middle rack.
Place the baking tray with water on the bottom shelf of the oven.
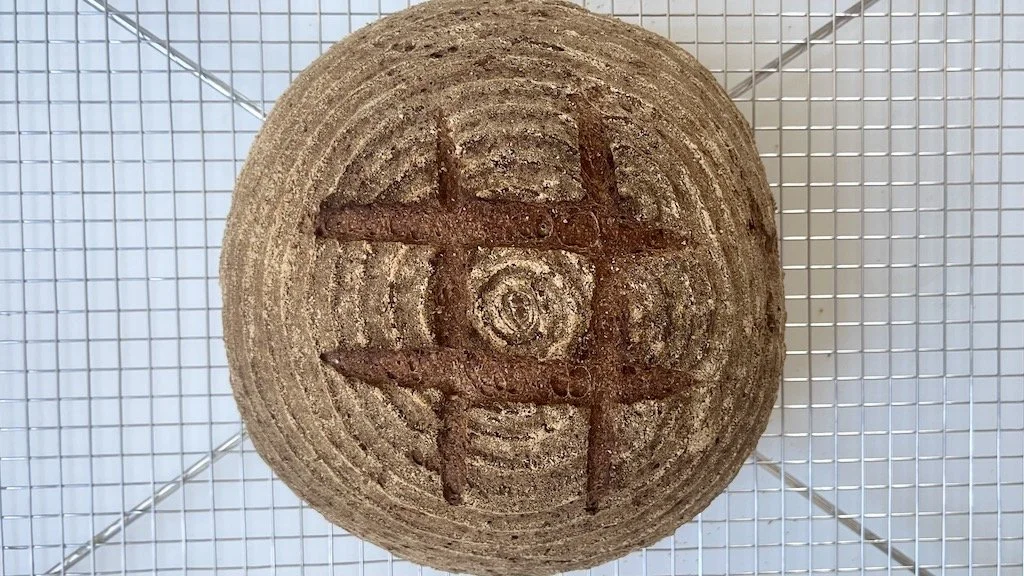
Once the dough has doubled in size, turn it out of the raising basket onto a piece of baking paper and score the top with a pattern of choice about 1/4 – 1/2 inch deep), using a sharp knife. Take the hot tart pan out of the oven and transfer the bread along with the baking paper into it.
Bake at 480 ºF (250 ºC) with steam for 20 minutes – don't open the oven or the oven doors during this initial period, as that would allow the steam to escape from the oven.
After 20 minutes, remove the bottom tray with water from the oven, reduce the oven temperature to 450 ºF (230 ºC), and bake for 40 - 50 minutes in a steam-free environment. The final bread should be of a deep, dark brown color. If the loaf starts browning too quickly, cover it with aluminum foil, shiny side up, and continue baking until done.
Transfer the bread onto a wire cooling rack to cool completely before cutting it.
Store the bread in a sealed container or in the baking dish covered with plastic or beeswax, in the refrigerator, or at room temperature. Or cut it into slices and pop it in the freezer.
Enjoy.